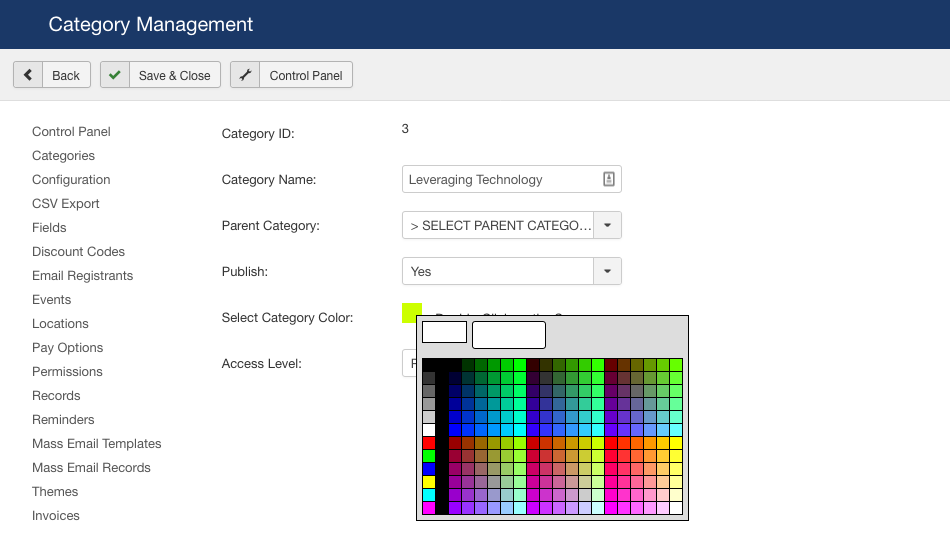
1. Create Event Category
Access Components > DT Register > Categories then hit the "New" button to create new category.
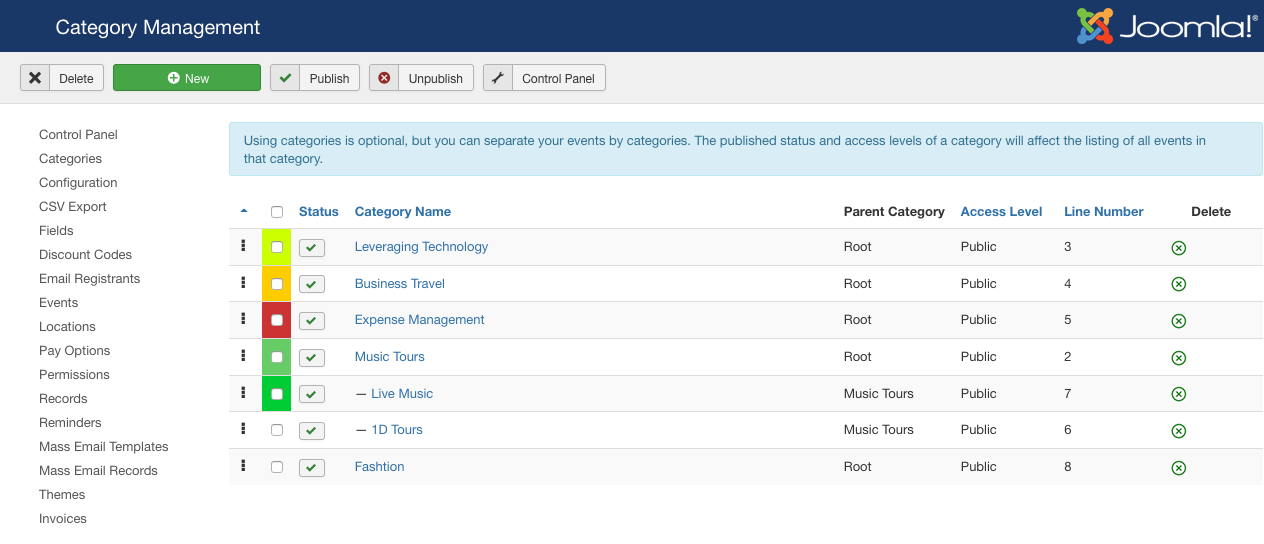
Next, update all fields for the category: Name, parent category, status, color (its used to show on calendar page, events of the category will get the color), and access level.
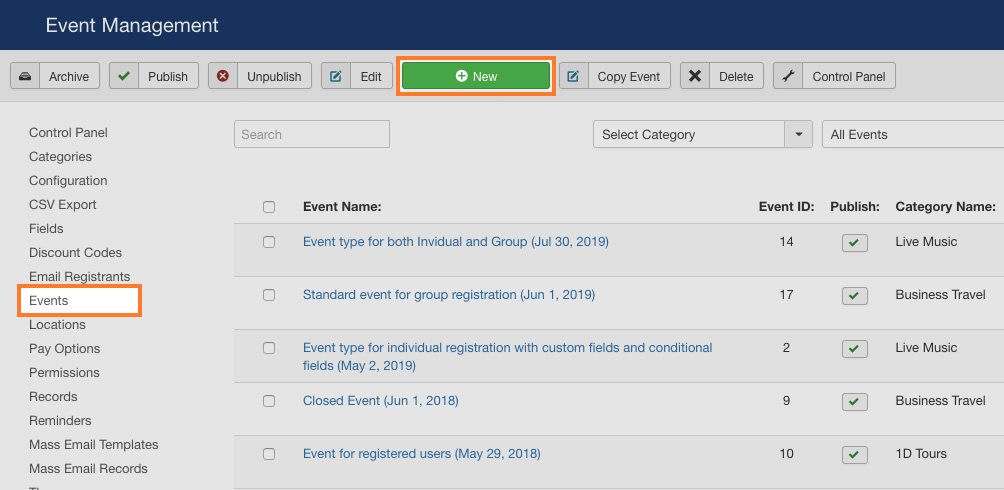
2. Create new event
To create new event, go to Events tab and create new event.
The event page includes lots of fields divided into groups (tab): General, Discount & Fees, Message, Emails, Fields, User Panel, Agenda, Sponsors and Speakers, we will go through one by one.
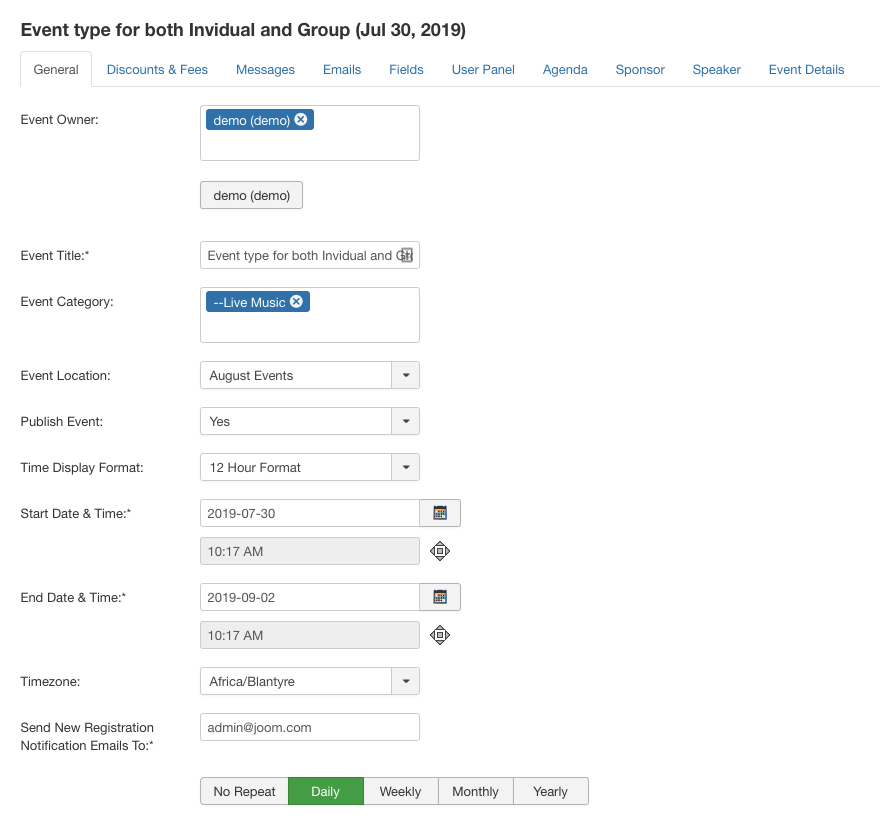
General settings:
In this section you can Add the Event owner, Title setup the location, category of event and Time zone with email settings. This section allow you setup all basic confiugration needed for an event.
Available fields in the Event General settings:
- Event Owner: assign user who is the owner of the event
- Event Title: add title for the event
- Event Category: assign category for event
- Event Location: assign location for the event, the location is managed in the
Locationspanel - Publish Event: publish the event or not
- Time Display Format: set 12 hour or 24 hour time format
- Start Date & Time: set start date and time of the event
- End Date & Time: set end date and time of the event
- Timezone: assign timezone for the event
- Send New Registration Notification Emails To: add email to get notification email when there is new registration
- Registration Types to Allow: allow individual registration, group registration or both
- Group Registration Type: select simple or detailed group registration
- Event Status: set the event to public or private
- Event Capacity: set capacity for the event
- Minimum Group Size: set the minimum of group size to register
- Maximum Group Size: set the maximum of group size to register
- Custom Confirmation Number Prefix:
- Registration Open Date: set date and time the event is availble to register
- Cut-Off Date: set date and time the event is not available to register
- Waiting List: enable or disable the waiting list
- Prerequisite Categories:
- Prerequisite Events:
- Event Details Article: select article if you want to link the event details page to
- Details Link ItemID Override: The ItemID for the Details link is automatically assigned as DT Register attempts to find the best ItemID for that article. If you wish to use a different Itemid than the one DT Register uses automatically, enter that ItemID here.
- Show Details Link: Select if you want to show the Event Details link in the list of events.
- Show Attendees Button: Select if you want to show the Attendees button under the event title which will take the user to a page showing all current registrants of the event.
- Duplication Prevention Override: The main configuration of DT Register allows you to prevent duplication registrations. This override parameter allows you to have the duplication check, but ignore it per event. If you want to override the global duplication check for this event, select YES. This will allow users to register even if their email has already been used in a registration for the same event. Select NO if you want this event to honor the global setting.
- Override Global Overlapping Check: The global configuration of DT Register has an overlapping event check. If you are using that parameter but you want to allow registration of other events even if they overlap with this event, you can exclude this event it here by selecting YES
- Exclude Event from Overlap Check: Select whether or not you want non-logged in users to be given username and password fields during registration to automatically create a user login account along with their registration.
- Joomla User Auto-Creation: Select whether or not you want non-logged in users to be given username and password fields during registration to automatically create a user login account along with their registration.
- Auto-Assigned User Group: If you select any user group(s) here, ALL registrants of this event will be automatically assigned to this user group in addition to any groups already assigned. For the user auto-creation feature, you set in the main configuration which User Group to assign the new user to. Here, you can override that and specify a User Group to assign registrants to from this event only.
- Event Image: Upload an optional event image to represent your event.
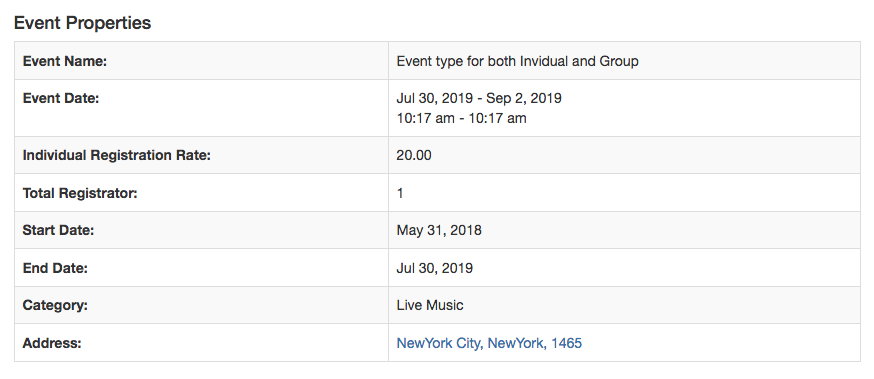
In front-end, the info is shown in the Event properties section.
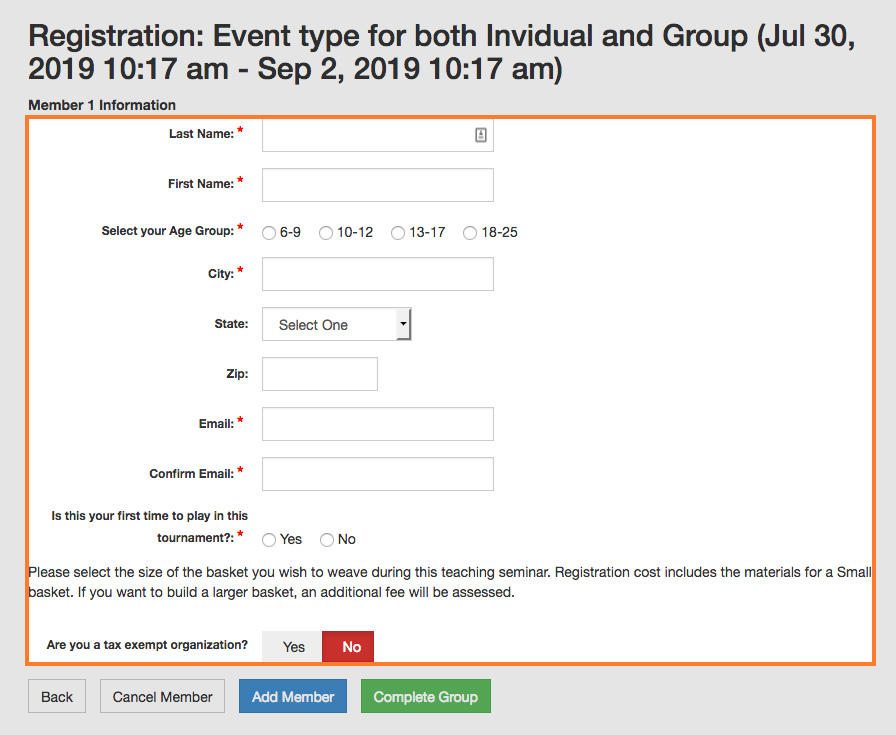
Individual and Group registration form in front-end screenshots:
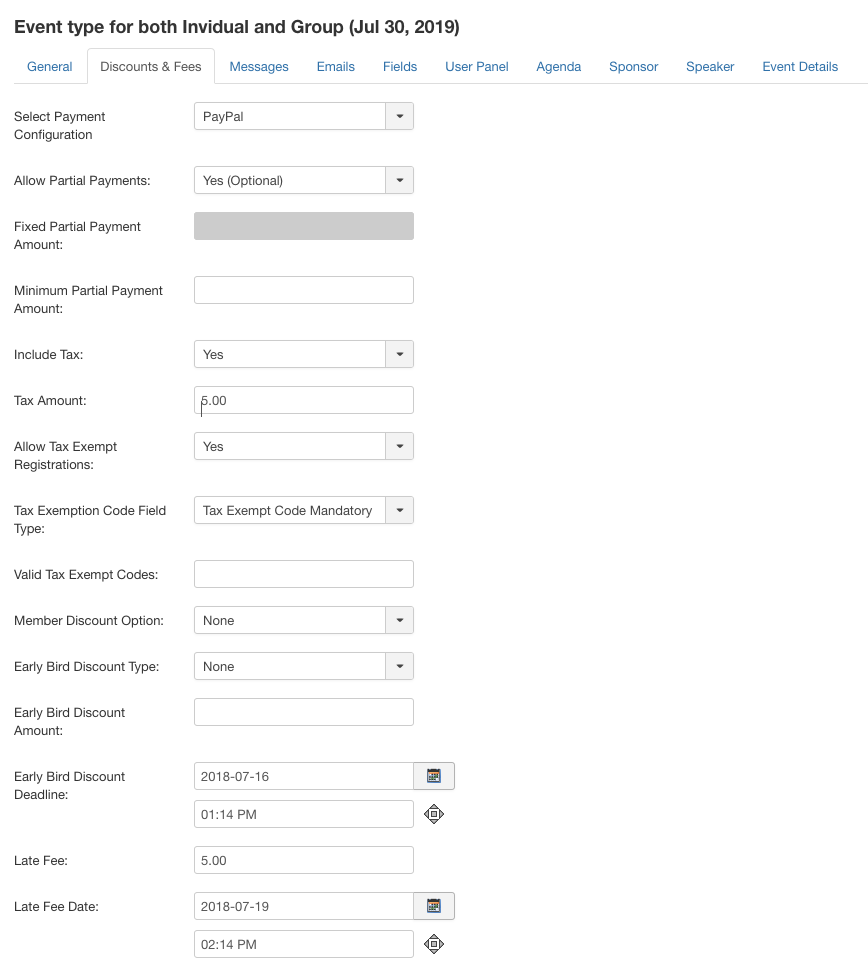
Discount and Fees:
In this section you can select the payment configurations to setup the payment method and tax settings.
This section also offers the Group registration rates that is optional : Use this section If you want to offer group discounts. You can offer discounts at multiple levels.
Pricing Settings
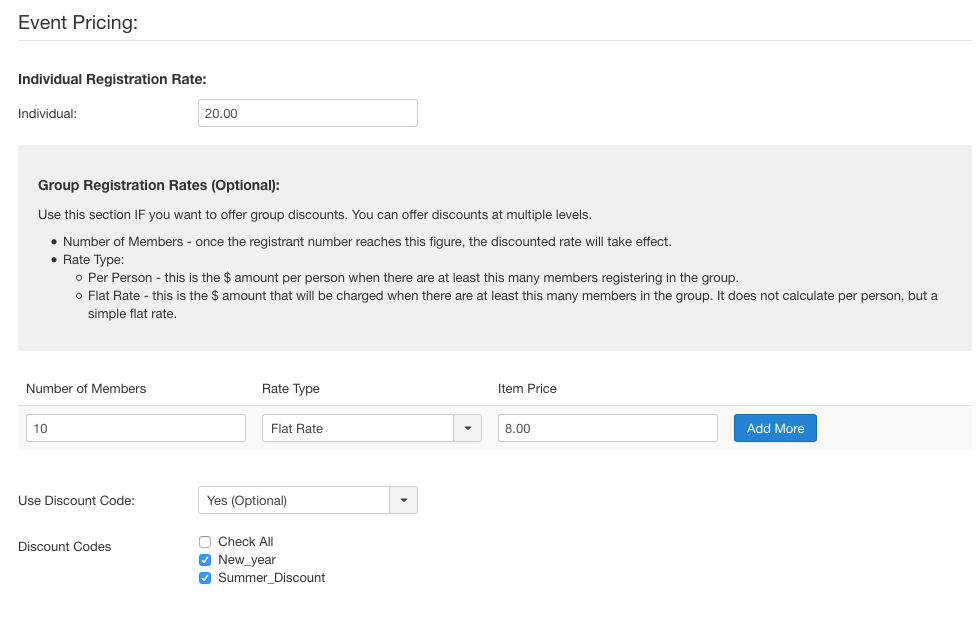
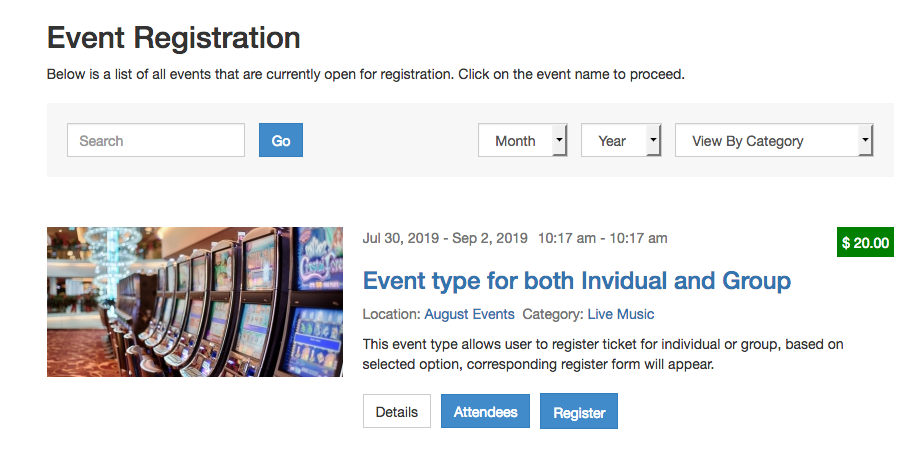
The price will be shown in both event list page and detail page.
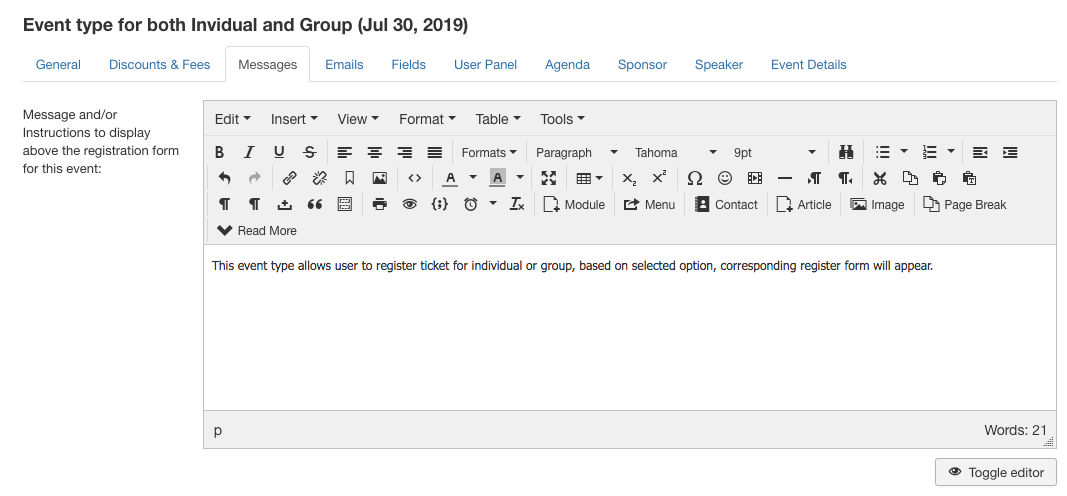
Messages settings:
This section allow you to display the message or instruction on above the registration form for the event. You can also set the short description for the event list page with custom event message setup
Message on Event registration form
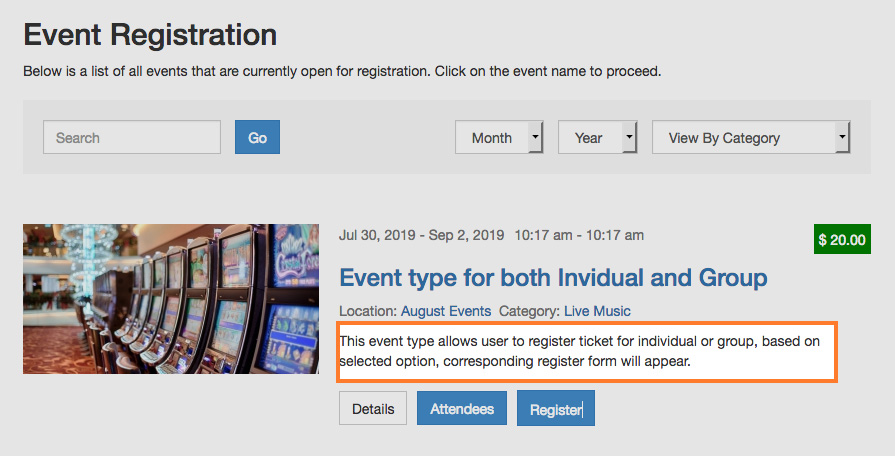
In front-end, the message will be displayed on event registration form.

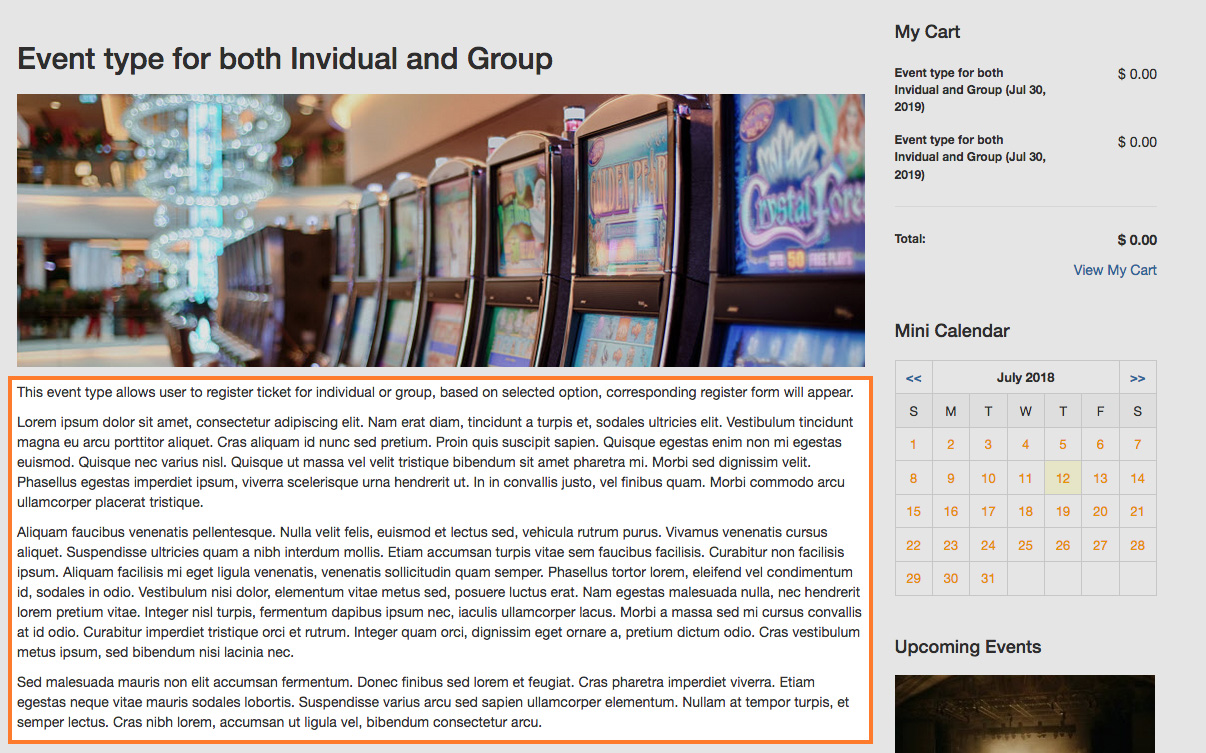
Event short description and event details content
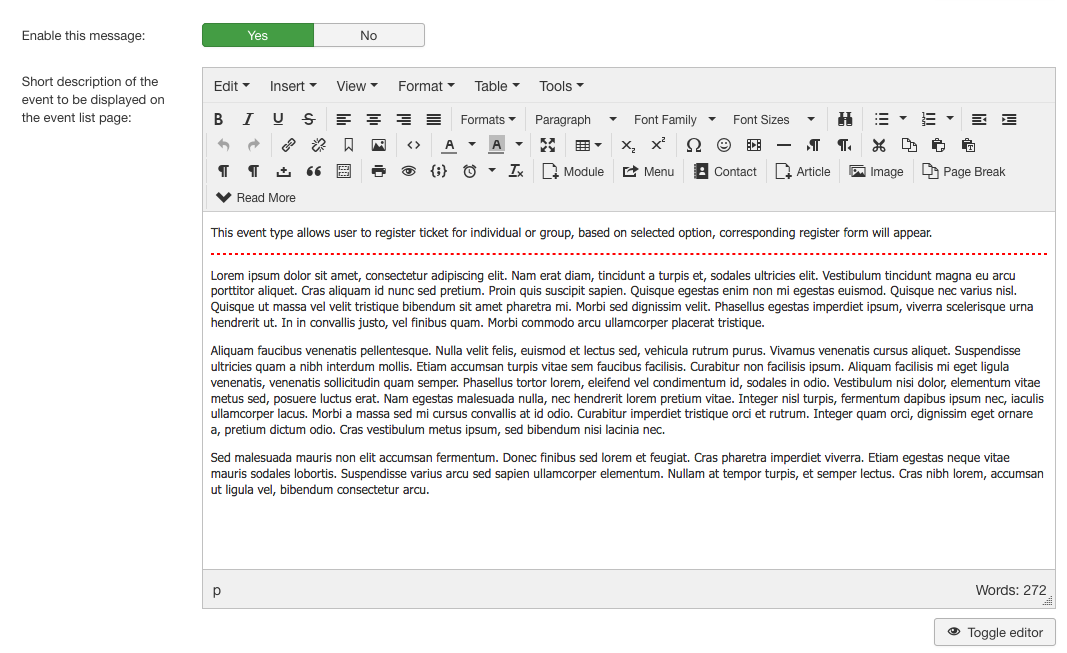
Using the read more tag to devide the description into event intro text and event details text. The intro text is shown in list page.
The details text is to displayed in event details page.
Custom Event Message Setup
This panel is to setup custom Thank You Message that shows onscreen after registering this event. Enable option "Enable this message" and add custom message.
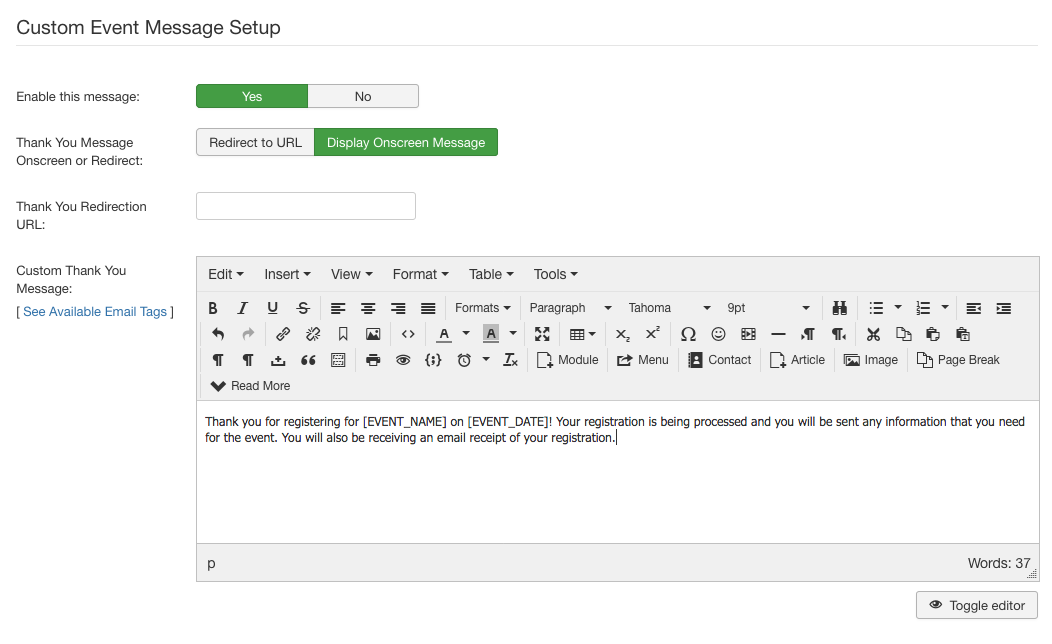
Notes: the global message (use for all events) is configured in the Configuration > Messages. So incase the custom event massage is disabled, it will use the global message.
Use the following tags to insert data from the registration. You can also use tags created in the Fields Manager:
- [EVENT_NAME] - Event Title
- [EVENT_DATE] - Event Date
Pay Later Thank You Message
This panel is to setup custom Pay Later Message that shows onscreen after registering this event. Enable option "Enable this message" and add custom message.

Notes: the global message (use for all events) is configured in the Configuration > Messages. So incase the custom pay later massage is disabled, it will use the global message.
Use the following tags to insert data from the registration. You can also use tags created in the Fields Manager:
- [EVENT_NAME] - Event Title
- [EVENT_DATE] - Event Date
Terms & Conditions
When enabled, this message will replace the general Terms & Conditions message from the settings page.
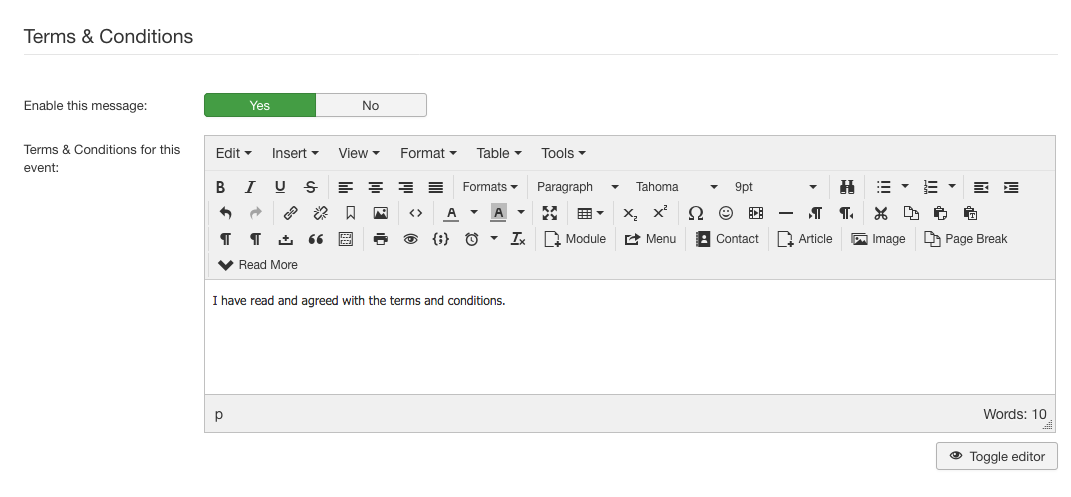
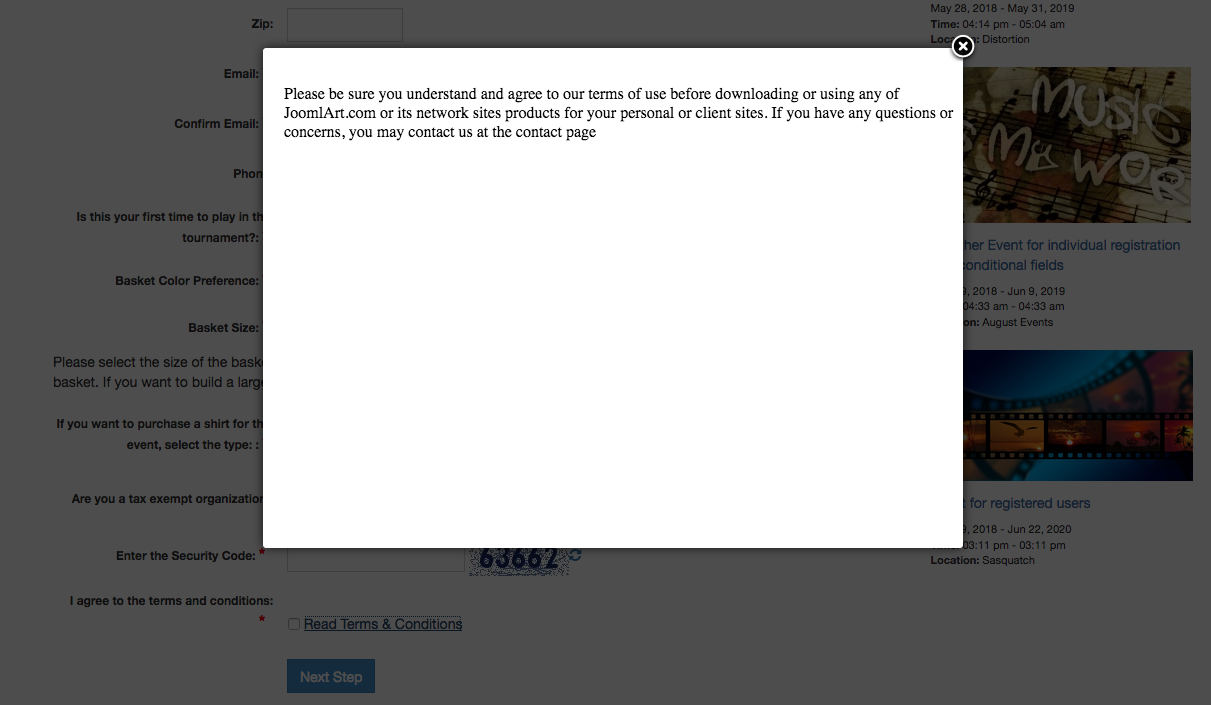
In event registration form, click on Read Terms & Conditions to show the terms and condition content.
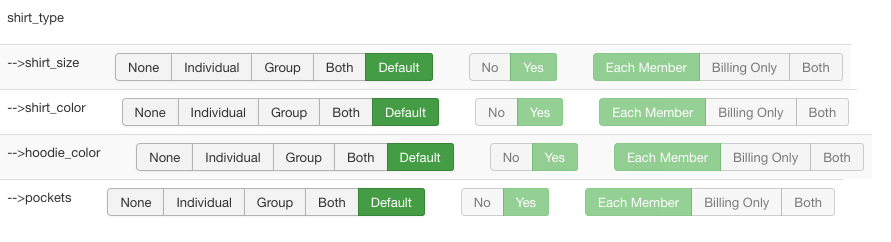
Fields:
Select which fields to use for this event and how to use them. Either use the Default settings already established for the field or specify custom settings.
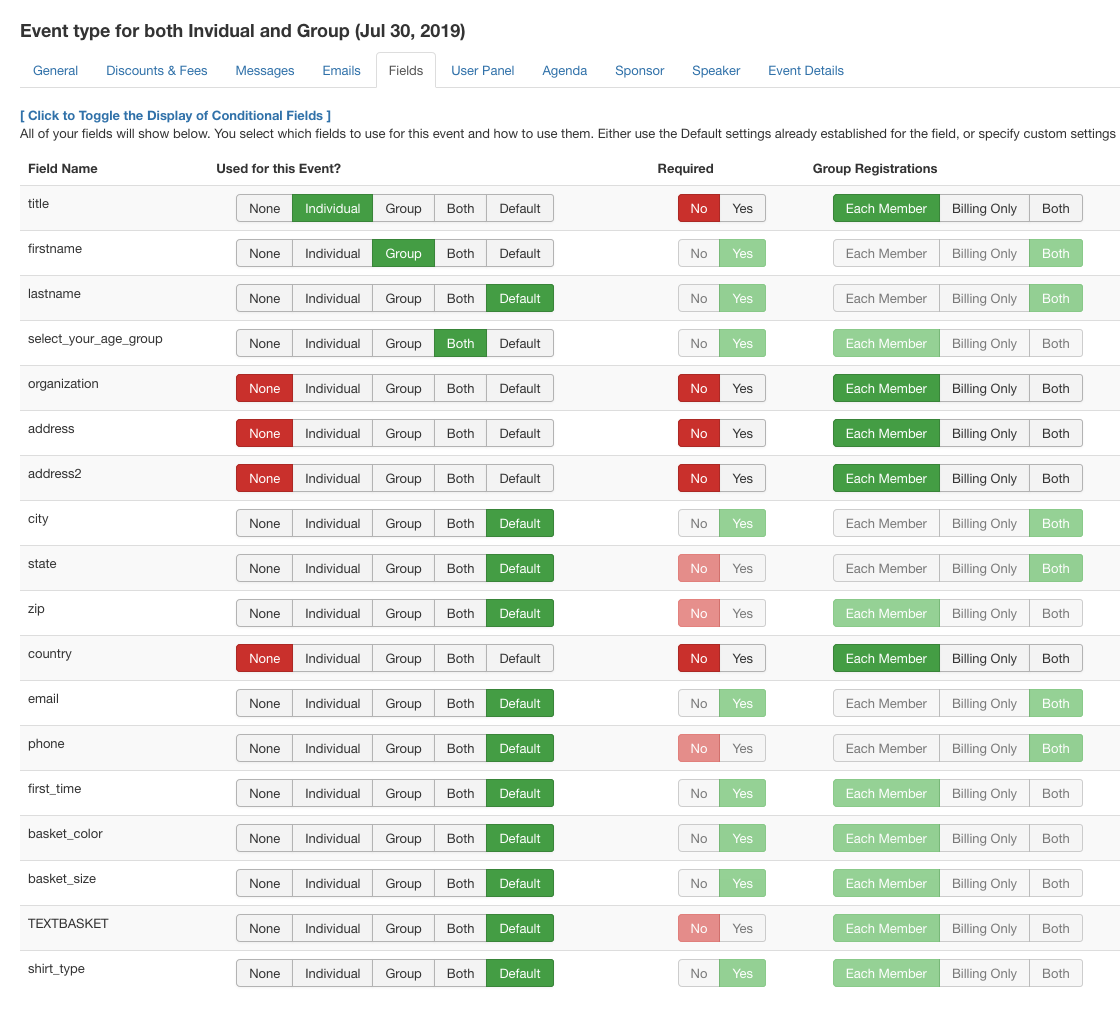
To configure conditional fields, click on the link [ Click to Toggle the Display of Conditional Fields ]
Note: the fields are managed in the "Fields" panel where you can create new fields and configure global settings for each field.
In front-end, you can see the fields in the event registration form.
User Panel:
In this section You can configure the cancellation and Refund fee settings
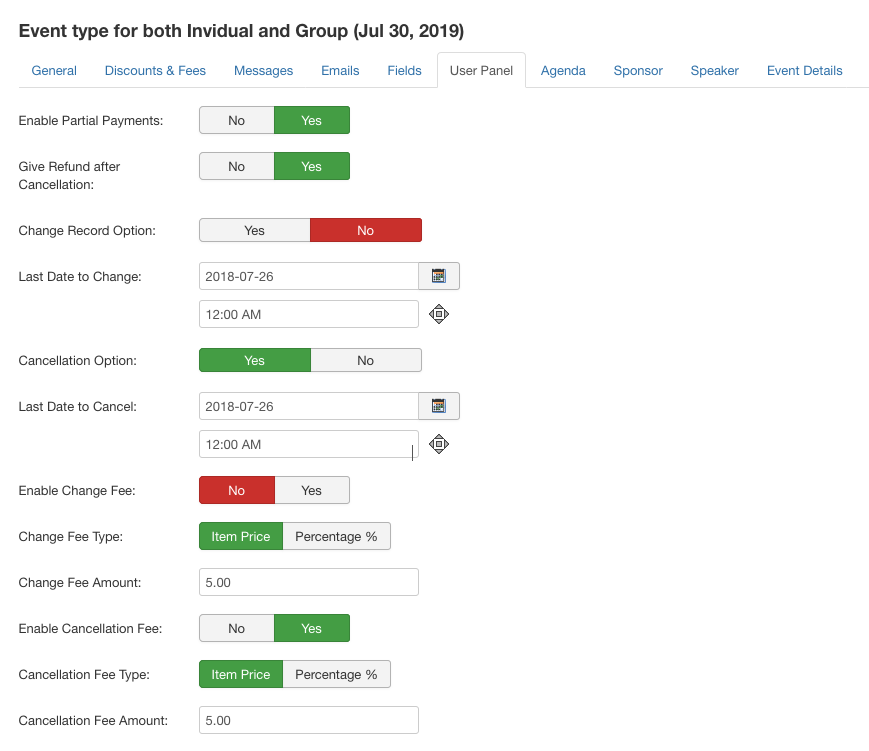
- Enable Partial Payments: If you enable this setting, users in the User Panel will have the option of paying the full amount due or entering a smaller payment amount for the purpose of making multiple payments.
- Give Refund after Cancellation: Select if you will give refunds to users after they cancel registrations. If you offer refunds, the refund amount will be calculated, but must be processed manually.
- Change Record Option: Select if you want to allow users to edit their registration record for this event. If you have setup an edit fee in the main configuration area, the user will have to pay the fee for changes to be applied.
- Last Date to Change: Enter the last date that a user will be allowed to make changes to their registration.
- Cancellation Option: Select if you want to allow users to cancel their registration for this event. If you have setup a cancellation fee in the main configuration area, it will be applied towards any refund amount that is due.
- Last Date to Cancel: Enter the last date that a user will be allowed to cancel their registration.
- Enable Change Fee: Select whether or not to enable a Change Fee. This fee would be added to a registrant's amount due if they make changes to their registration.
- Change Fee Type: Select if the Change Fee is a $ amount or a % percentage.
- Change Fee Amount: Enter the Change Fee amount. Do not include a currency symbol or % sign.
- Enable Cancellation Fee: Select whether or not to enable a Cancellation Fee. This fee would be added to a registrant's amount due if they cancel their registration.
- Cancellation Fee Type: Select if the Cancellation Fee is a $ amount or a % percentage.
- Cancellation Fee Amount: Enter the Cancellation Fee amount. Do not include a currency symbol or % sign.
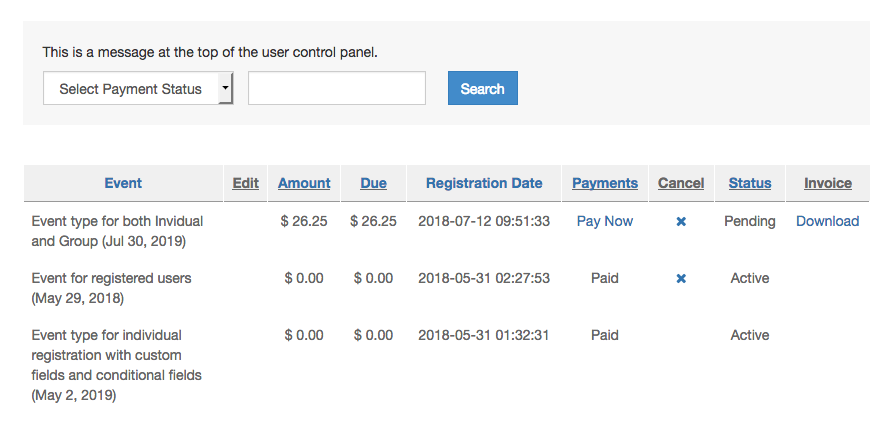
When login, user can access their user panel page where they can find their registration details.
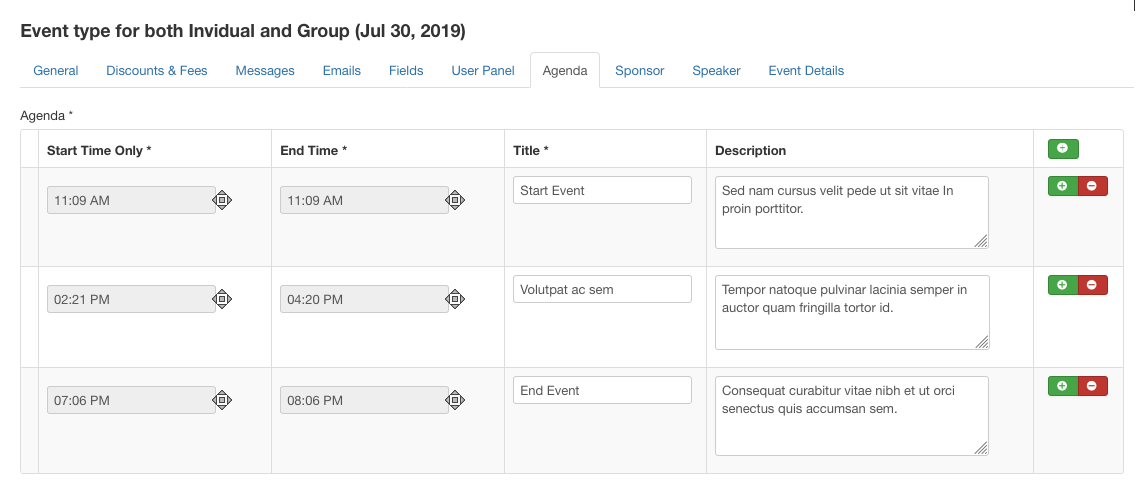
Agenda:
This section allow you add Agenda on the Event page. You can add the Start and end time with title and description.You an add and delete the agenda by click on + - Buttons.
Front-end:

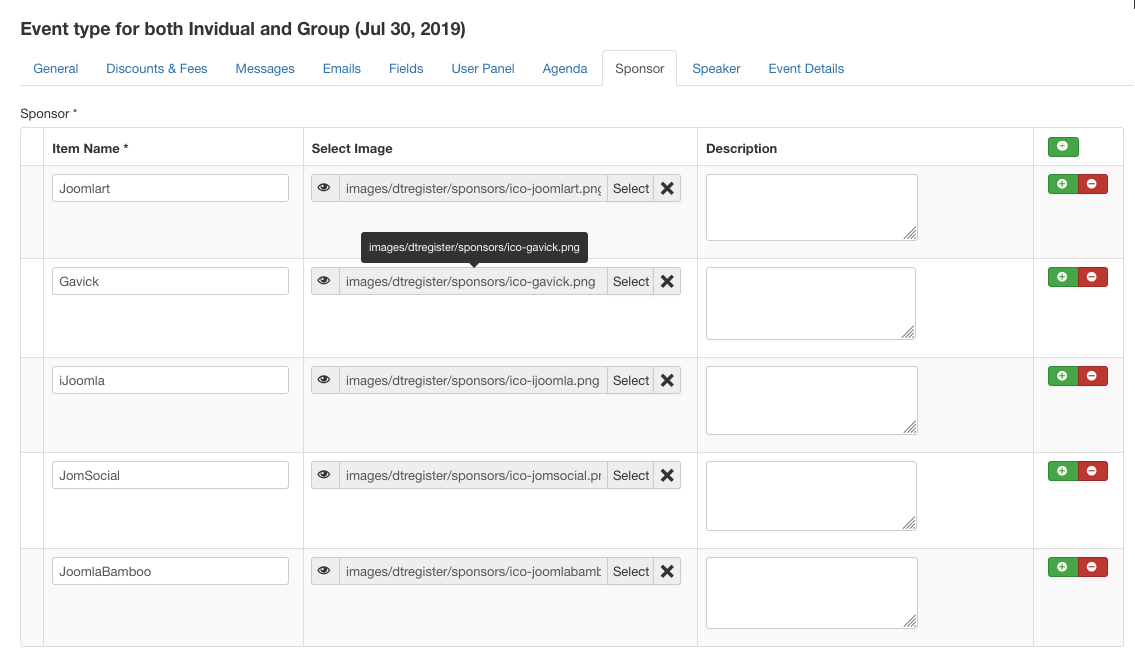
Sponsors:
This section allow you add Sponsors on the Event page. You can add the sponsors name, image, and description.
Front-end:

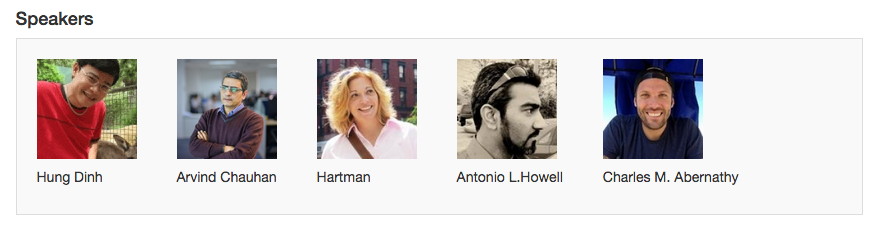
Speakers:
This section allow you add speakers on event page.You can add speakers name,image and description for multiple speakers.

Front-end:
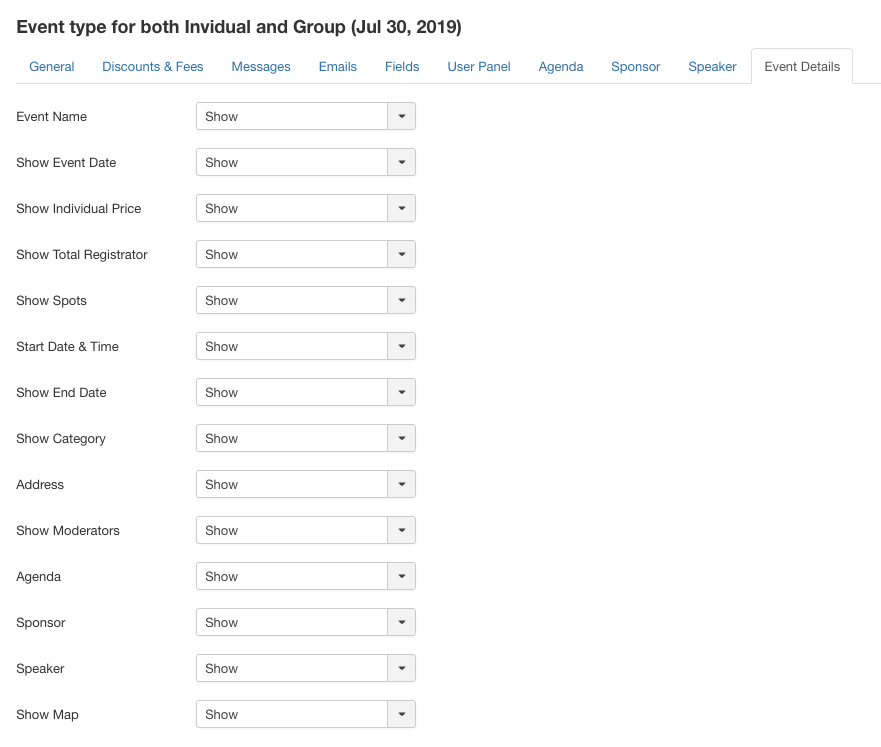
Event Details:
This section allow you to configure the event details page, You can show hide the event name, price, regsitered users, catrgories, Address etc.