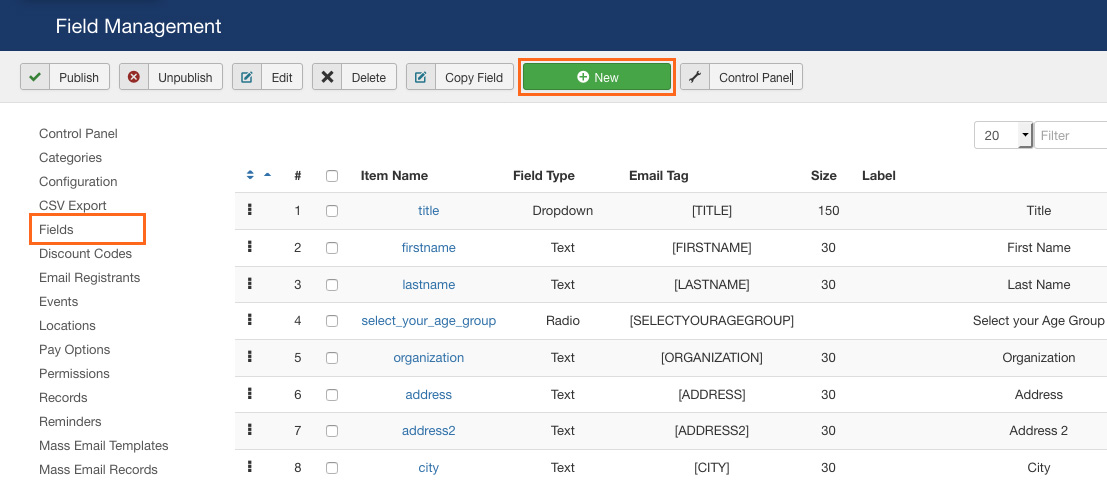
Step 1: create new custom fields
To create new custom field, access Fields panel and hit the add new button.
Create new custom field
Each custom field include 3 main sections: Details, Conditional options and default settings
#1. Custom field details settings
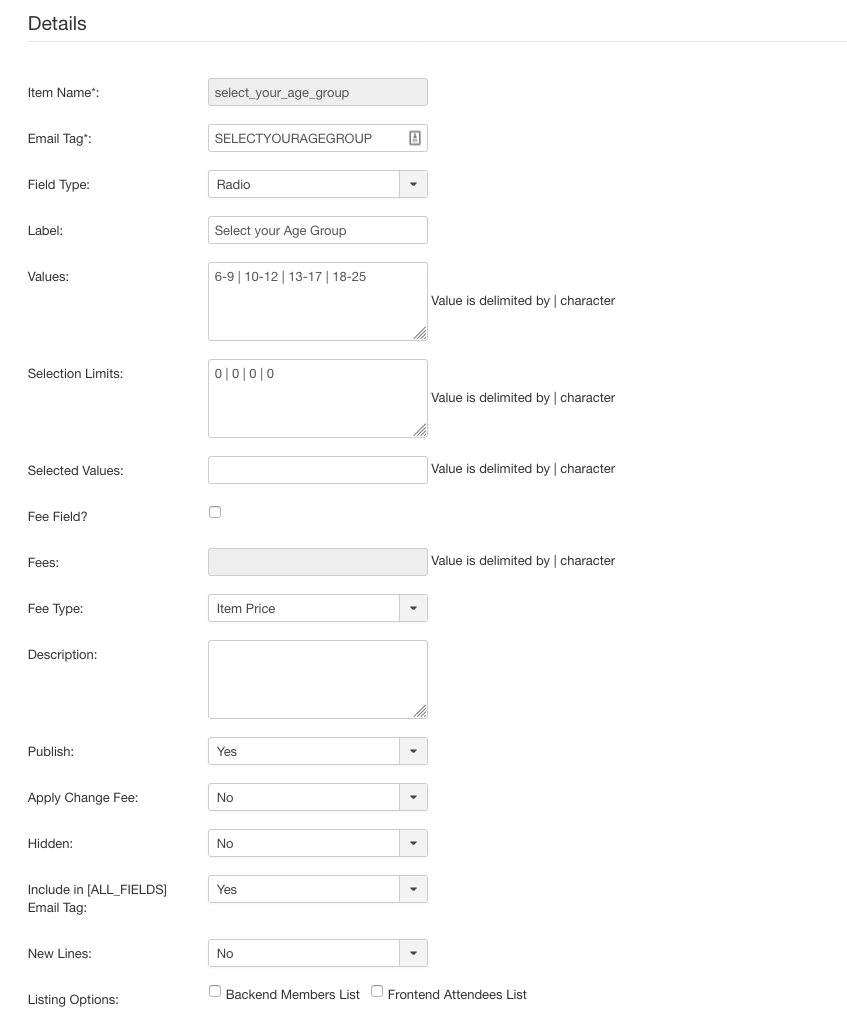
Custom field details settings
Parameters explaination:
- Item name: Enter a name for this field. This is what is used for database purposes and is not displayed anywhere. NO SPACES are allowed in this box. Only characters a-z, A-Z, 0-9 or _ are allowed.
- Email tag: Enter a text tag to be used in email messages to populate this field from a registration. In email it is used like [FIRSTNAME], but here only enter the text. Do NOT enter the brackets here.
- Field Type: assign field type for the field, there are 10 supported field types: text, dropdown, texarea, checkbox, radio, date ... with each selected field type, there will be corresponding fields to configure.
- Label: Enter the label for this field. This is what will show on the form for end users to see.
- Publish: Mark if you want to publish or unpublish this field.
- Apply change fee: Select if you want changes to this field in the frontend user panel to cause the Change Fee to be added.
- Hidden: Select if this field is to be hidden or not. If YES, then it will not show on the frontend of the website for users. It will only be seen and used by the administrator to record
- Include in [ALL_FIELDS] Email Tag: Select if you want to include the data from this field inside of the [ALL_FIELDS] email tag, which will display a list of data from all fields that are selected to be included.
- Maximum File Size: Enter the maximum file size for this upload. Size is in KB. Enter only the number and do not include any letters.
- Accepted File Types: Enter the accepted file types in a comma-separated list. Enter only the extension letters and do not include periods.
- Upload Attachment(s): Select Yes or No if you would like the uploaded file to be included as an attachment to the admin notification email for new registrations.
- Listing Options: Select where to show this field in various listing locations. The Attendees List is the frontend view of current registrants. The Member Listing is the backend view of members in a group registration.
#2. Custom field conditional options
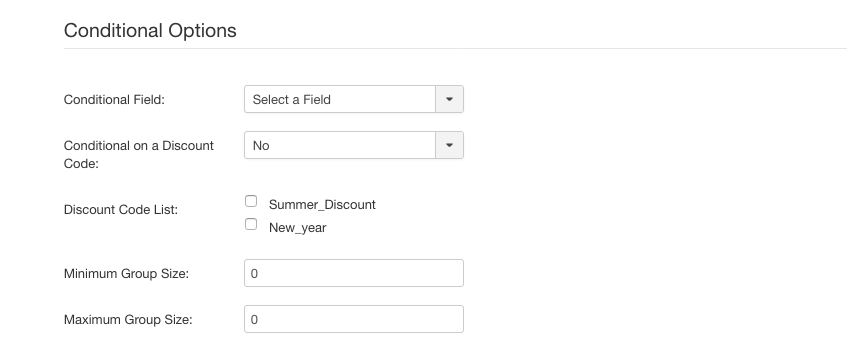
Custom field conditional options
Parameters explaination:
- Conditional Field: If you want the display of this custom field to be conditional, based on the use of another custom field, then select that field from the dropdown. Only checkbox, radio button and dropdown fields will show as an option. After selecting the field, all Values from the selected field will show. Then check the box for any value that will enable the display of this field after the user selects the designated value.
- Conditional on a Discount Code: Select whether or not this field is conditional on the acceptance of a discount code. If Yes, then you will need to select at least one of your discount codes to establish that this field will display IF the one of the selected discount codes is entered and accepted in the registration form.
- Discount Code List: You must check at least one discount code here if you want to make this field conditional on the acceptance of one or more discount codes.
- Minimum Group Size: By entering a number here, you can restrict this field in GROUP registrations to only be displayed if the size of the group is this number or GREATER. Default is 0 and means the condition on group size will be ignored.
- Maximum Group Size: By entering a number here, you can restrict this field in GROUP registrations to only be displayed if the size of the group is this number or LESS. Default is 0 and means the condition on group size will be ignored.
#3. Custom field default settings
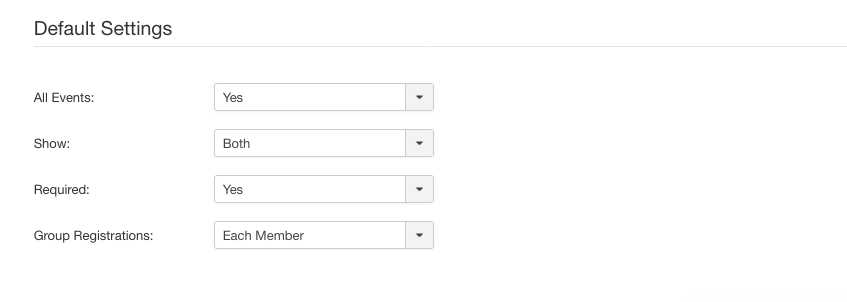
Custom field default settings
Parameters explaination:
- All Events: Select if you want to automatically enable this field for all events currently active events. The field will be enabled and set to use the Default field settings.
- Show: Select if you want the default setting for this field to be disabled (None), shown in Individual registrations, Group registrations or Both. You can still set it differently per event... this just gives a default setting.
- Required: Select if you want the default setting for this field to be Required. You can still set it differently per event... this just gives a default setting.
- Group Registrations: Select the default setting for this field when applied to members in a group registration. Should it be used for each member in the group, final billing page only, or both places You can still set it differently per event... this just gives a default setting.
#4. Profile Settings
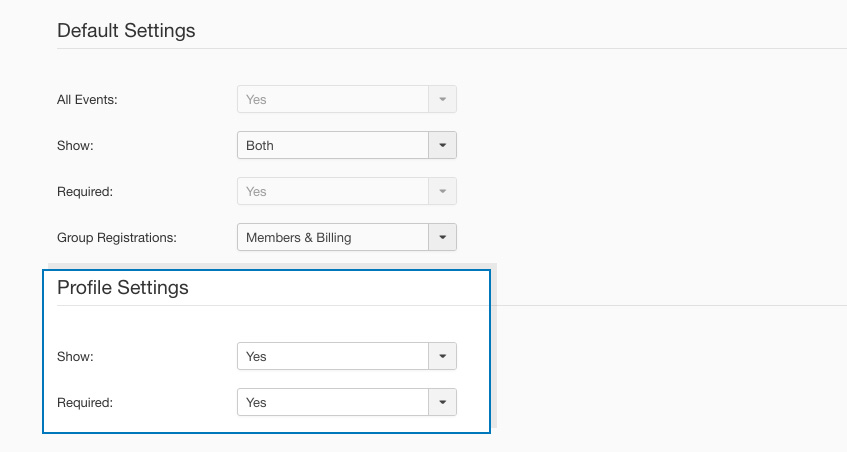
Profile settings
Parameters explaination:
- Show: Select if you want the default setting for this field to be disabled (None), shown in Individual registrations, Group registrations or Both. You can still set it differently per event, this just gives a default setting.
- Required: Select if you want the default setting for this field to be Required. You can still set it differently per event... this just gives a default setting.
Frontend view:
When user registers an event, in the event registration form, data of profile fields will be auto loaded. This will save time for user to update the data every time they register event.
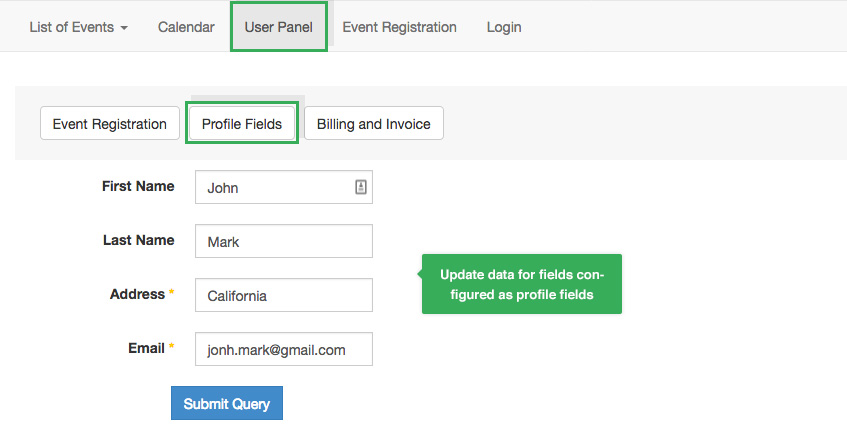
User Profile
Note: User can change the data of the profile fields in the event registration form, the data will not be updated to the default data of the profile fields.
Step 2: Configure custom fields for specific event
In the editing page of event, open the Fields setting panel, you can configure to show or hide specific fields.
Select which fields to use for this event and how to use them. Either use the Default settings already established for the field or specify custom settings.
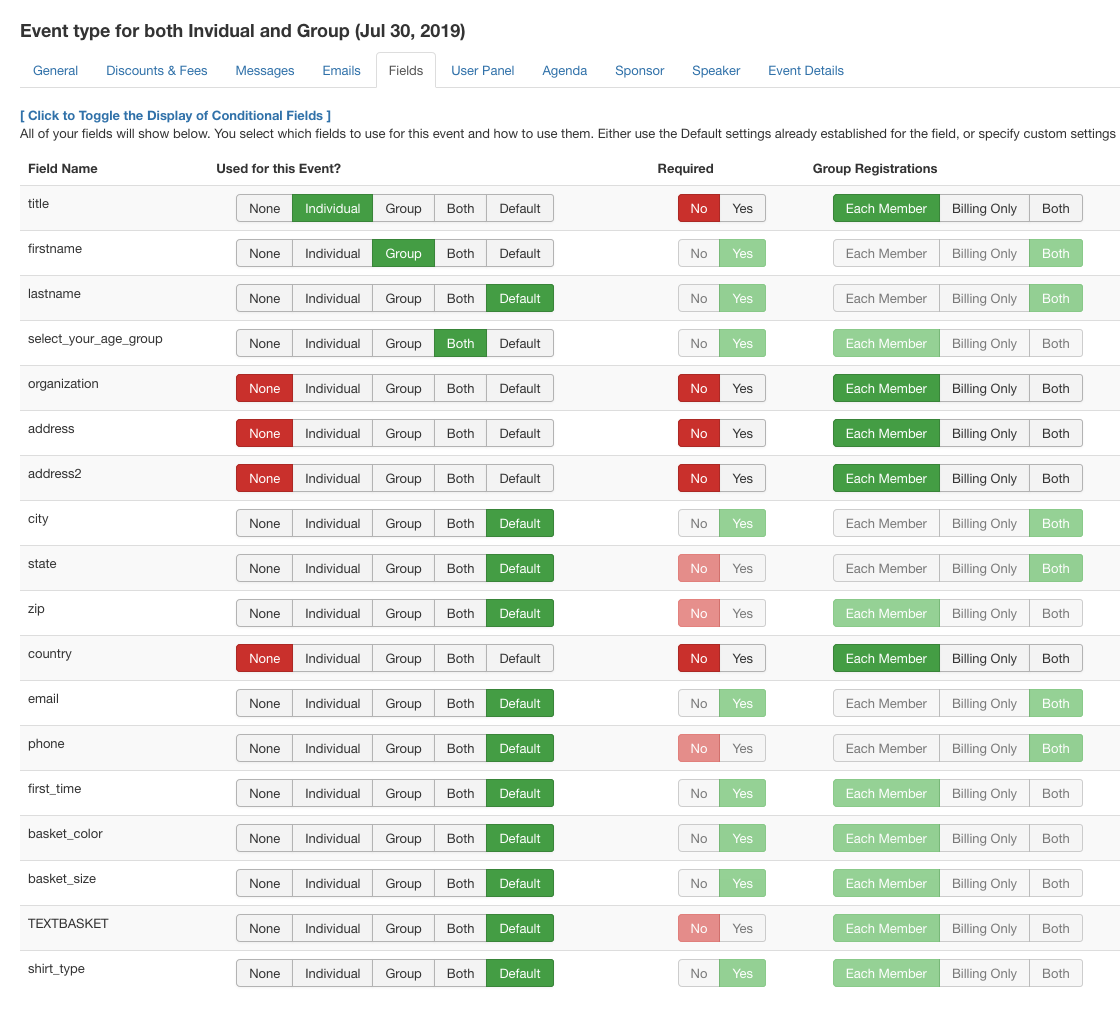
event fields settings
To configure conditional fields, click on the link [ Click to Toggle the Display of Conditional Fields ]
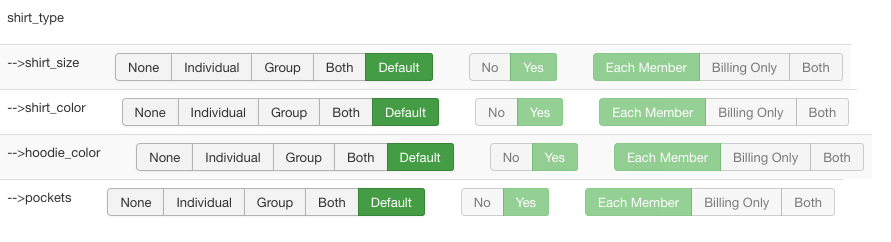
Configure conditional fields
In front-end, you can see the fields in the event registration form.
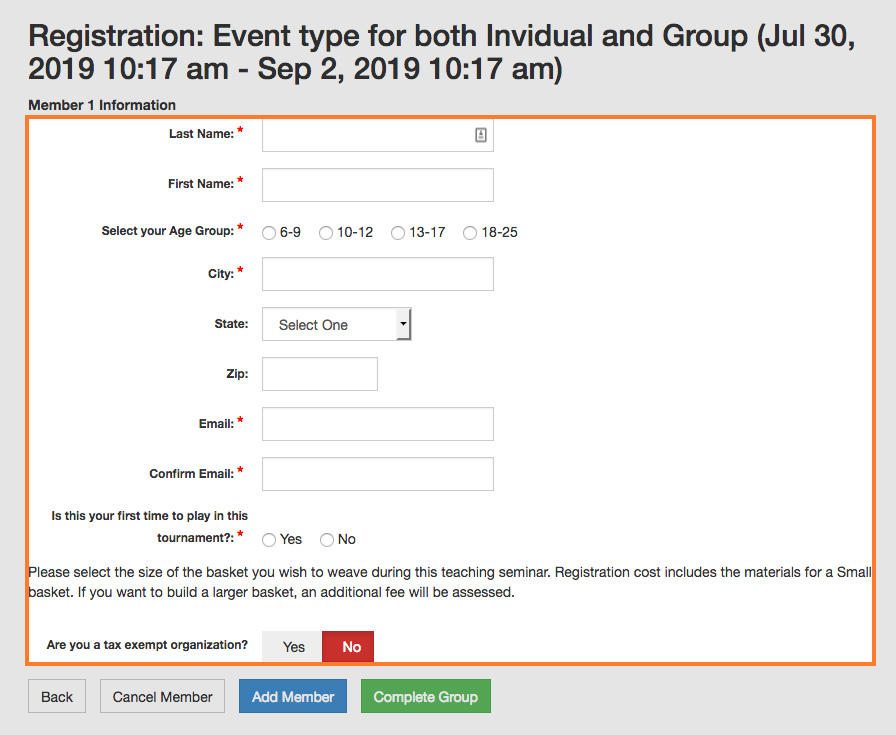
Custom fields shown in registration form